How to Save Helium in (Vacuum) Leak Testing
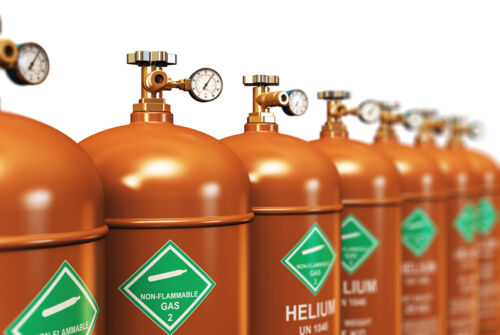
Leak detection commonly relies on the use of helium as a tracer gas, mainly due to its ideal properties. Helium is preferred as a tracer gas because:
- it has a low natural background in air so that the gas escaping from a leak can reliably be distinguished from surrounding air
- it is inert and does not react with any other media
- it is not emitted to typical industrial testing areas
- it is not harmful to anybody’s health and it is environmentally friendly
However, the consumption of helium influences the cost of operation. So many users are looking for ways to save helium in vacuum leak testing. This article explains how helium can be saved, steps you take to do it and what to watch out for.
Working with lower concentrations of helium
For many industrial applications, it is not necessary to work with pure helium. Helium as an inert gas can simply be mixed with air and the mixture can be used for leak testing. However, to do so, a couple of things need to be considered.
Properly controlling the helium concentration in the mix
To get accurate results in leak testing, it is mandatory to properly control the helium concentration in the tracer gas mix you are using. Any deviation in the concentration will cause a deviation in the leak rate, and typically in an amplified way.
Example: A mixture of 10% helium in air is used for leak testing. If the helium concentration fluctuates by ±1% (so that the helium concentration fluctuates between 9 and 11%), this will cause a deviation of the leak rate detected of ±10% (= 1% / 10%). |
|---|
For accurate leak detection, the concentration of the helium mixture should be controlled in the range of 5% of the absolute concentration. (i.e., in our example of 10% helium concentration, the concentration should always be between 9.5 und 10.5%). A deviation of 5% for the leak rate means, for example, that a 2·10-5 mbar·l/s leak rate is shown as a 2.1·10-5 mbar·l/s leak rate.
Using a leak detector with sufficient sensitivity
If you want to work with diluted helium, you need to consider that the leak detector will only react to the helium portion of the tracer gas. So, you need to make sure that the smaller amount of helium will still be detected reliably. For example, if you work with 10% helium in the tracer gas mix, the leak detector must be able to detect leaks one decade smaller than the actual leak rate to be detected, in this case, 1/10 of the leak rate.
How to adapt your leak detection process to diluted helium
If you want to work with diluted helium, you need take this into account in your leak detection standard operating procedure. This mainly effects how to calibrate the leak detector and how to set up the trigger level.
You can compensate for the lower helium concentration either by adjusting the trigger value OR by adjusting the leak rate in the calibration routine.
TIP Sniffer leak detectors from INFICON allow to enter the concentration of helium used in the menu of the leak detector and the leak detector software makes all adjustments automatically - for easy and reliable use of diluted tracer gas. (For using sniffer leak detectors from INFICON, you can skip the rest of this chapter and go straight to the next headline) |
|---|


To adjust the trigger value, the new trigger level should be set to the original value multiplied with the helium concentration.
Example If you want to test for a reject leak rate of 2·10-5 mbar·l/s, and you intend to work with 10% helium only, your trigger level needs to be adjusted to 2 · 10-5 mbar·l/s · 10% = 2 · 10-6 mbar · l/s If you want to test for a reject leak rate of 3·10-6 mbar·l/s and you intend to work with 30% helium only, your trigger level needs to adjusted to 3 · 10-5 mbar·l/s · 30% = 9 · 10-6 mbar · l/s |
|---|
Alternatively, if you want to compensate for the helium concentration during calibration, the most obvious way would be to calibrate with a test leak that is also filled with the helium concentration to be used later for the leak testing process. However, you can also properly calibrate with a calibration leak filled with pure helium. To do this, you simply adjust the calibration leak rate by the helium percentage. The leak rate used in the calibration settings should be the leak rate of the test leak divided by the concentration of helium.
Example A 3·10-6 mbar·l/s calibration leak is to be used for calibration. The system will use a mixture of 10% helium in air. So only 10% of the gas escaping from leaks will be helium. In that case, you can use a leak rate setting of 3 · 10-6 mbar . l/s / 10% = 3 · 10-5 mbar · l/s |
|---|
in the calibration routine and the system will show all detected leak rates correctly after calibration.
If you use the same calibration leak, but intend to work with 30% helium, your calibration settings need to be adapted to
3 · 10-5 mbar . l/s / 30% = 1 · 10-4 mbar · l/s
Please note that for this approach, the trigger value should not be changed from its original value.
Using a leak detector with good linearity
When working with a lower concentration of helium, the helium signal of the leak detector will move closer to the leak detectors detection limit. It is especially important in this case not to calibrate with too small leaks, e.g. with a leak rate equivalent to the reject leak rate. A leak rate equivalent to the reject leak rate will now be close to the detection limit of the leak detector and will result in a less accurate calibration (as described in detail here in the first tip: "The top 5 mistakes in calibration and how to avoid them.")
A better approach is to calibrate with a larger leak for accurate and repeatable calibration. However, this requires a good linearity of the measurement signal. For working with diluted helium, it is even more important to use highly accurate leak testing equipment. A verification leak with a leak rate equivalent to the reject leak rate can be used for qualification of the test system or factory authorization testing.
Use dynamic background suppression in vacuum leak detection
Working with diluted helium is especially beneficial for larger volume parts. However, in vacuum leak testing it may take slightly longer until the background of your testing system has decreased to low enough levels to start the leak testing process. In that case, the use of dynamic background suppression will help shorten your cycle time. The I·Zero background suppression (patent pending) of the LDS3000 leak detector offers excellent dynamic background suppression enabling enormous helium savings without sacrificing throughput.
Recovering and reusing the helium
In many industrial processes, helium recovery can be used to reduce the consumption of helium. For helium recovery, the helium is reclaimed from the part to be tested after the leak detection process. Typically, only the overpressure part of the helium filling is reclaimed, i.e., if a part is filled with 5 bar of helium for leak testing, the helium will be vented back into a tracer gas supply system until the pressure in the part has decreased to atmospheric pressure. In that case 4/5 = 80% of the helium can be recovered. The remaining helium will stay in the part for delivery.
With a helium recovery system, the amount of helium in the system decreases with every testing cycle. So, the helium recovery system needs to be backfilled with fresh helium to maintain a constant concentration of helium. In our example, the system needs to be backfilled with 20% of the inner part volume of helium for each testing cycle.
Helium recovery systems can also be used with diluted helium. In that case, the amount of helium to backfill the system is significantly smaller. If you use 10% helium in air, the system only needs to be backfilled with 10% helium of 20% of the inner part volume = 2% of the inner part volume of helium for each testing cycle.
Quality of the helium used
Helium is offered in different grades of purity:
| Helium Grade | Helium Purity |
|---|---|
| Helium 5.0 | 99.999% helium and 0.001% impurities |
| Helium 4.0 | 99.99% helium and 0.01% impurities |
| Helium 3.0 | 99.9% helium and 0.1 % impurities |
| Helium 2.0 | 99% helium and 1% impurities |
| Helium 3.5 | 99.95% helium and 0.05% impurities |
Even the lowest purity helium will have only 1% impurities and will therefore cause an error to the leak rate of 1%. Even if this low purity helium is used as a 10% mix with air, the error in the leak rate due to impurities will only be 1%.
Typically, the lower purity grades are sold for lower pricing. Any grade of helium even down to helium 2.0 can be used for leak detection without any problems. So simply use the grade that is offered at the lowest price.
Lowering the fill pressure of the parts
Some users have asked to lower the fill pressure of the parts (so that it takes less helium to fill) and then test for a lower leak rate. The leak rate typically changes with the pressure to the second power, i.e., if you half the fill pressure, you will see about ¼ of the leak rate only.
Although, this is mathematically true, there are other factors that influence the leak rates. There are leaks that may only open at higher pressure and therefore may have a very low leak rate at a low fill pressure, but a much larger leak rate at operating pressure. We, therefore, recommend to always test with tracer gas fill pressure equivalent to the operating pressure.
Conclusion
When combining the use of diluted helium with helium recovery, the total amount of helium used can often be reduced by more than 90%. To do so, it requires proper control of the helium concentration as well as a highly sensitive and accurate leak detector.
Please contact us for advice if you want to reduce your helium consumption! Our experts will be happy to help!